Peppermint Chocolate Thumbprint Cookies
New and improved! Easy Peppermint Chocolate Thumbprint Cookies are delicious buttery chocolate treats that are baked to perfection and topped with a colorful red and white chocolate peppermint kiss.
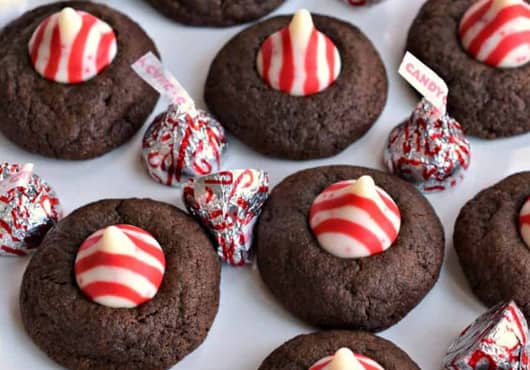
Fun holiday peppermint chocolate thumbprint cookies topped with a white chocolate peppermint kiss. These Christmas cookies are family friendly, easy to make and so delectable.
#ChristmasDeserts #HolidayDesserts #HolidayBaking #HolidayTreats #HolidayRecipes #ChristmasParties #ChristmasCave #ChocolateChristmasCookies
INGREDIENTS
- 1 cup unsalted butter softened (preferably Land O Lakes)
- ½ cup sugar
- ¼ cup packed light brown sugar
- 2 egg yolks
- 1 teaspoon vanilla extract (or 3/4 teaspoon peppermint)
- 1 1/2 cups all purpose flour
- ½ cup unsweetened baking cocoa
- ¼ teaspoon salt
- ½ teaspoon baking powder
- ½ teaspoon baking soda
- 28 –30 frozen peppermint kisses
INSTRUCTIONS
- Preheat oven to 350 degrees. Cover baking sheets with parchment paper or silicone mats.
- Cream butter and both sugars with mixer until light and fluffy. Turn mixer to low and add egg yolks one at a time and mix just until incorporated. Mix in vanilla extract.
- Whisk together flour, baking cocoa, salt, baking powder and baking soda in a medium bowl. Add the dry mixture to butter mixture in 3 parts. Blend on low after each addition just until combined; scraping down the side of mixer bowl as needed. Remove bowl from mixer, cover and refrigerate for at least 3 hours up to overnight.
- Butter hands and roll dough into a little less than 1 inch balls. Place on cookie sheet with 1-2 inches between cookies.
- Bake for 7-8 minutes. Allow to cool for 3 minutes only. Press 1 peppermint kiss into the top of each cookie. Carefully move to cookie cooling racks without touching the peppermint kiss as it may be soft.
NOTES
- Always preheat the oven and load your cookies on the middle rack in the center of the oven.
- Cover your baking sheets with parchment paper or silicone mats.
- For best results freeze the kisses two hours before starting the recipe. This will help keep the kisses from melting when you place them on the top of the cookies.


Comments
Post a Comment